


Flipkart Seller Hub Overview
Flipkart is one of the giant ecommerce companies in India. They offers the Flipkart Seller Hub for those who desire to sell products and earn online. It stands out as a powerful selling platform for any seller, allowing them to demonstrate their products and reach a customer base of over 50 crores.
Regarding marketing insights, Flipkart has been progressing progressively year by year, significantly holding a more prominent segment of the e-commerce market share in India. Alone in 2023, it held a share of over 40% of total digital retailing sales. While having more than 500 million active users and a tremendous warehouse logistics structure, Flipkart’s growth path is boosted by uplifting internet usage. Besides, increasing smartphone penetration and changing customer behavior are also supported reasons.
Today, Flipkart Seller Hub already has a trust base and community of more than 1.4 Million sellers. The platforms enable them to reach their products to a wide area of the nation, touching 19,000 pin codes. Also, given that the e-commerce and b2b portal segment in India is expected to grow at a CAGR of 20% by 2025, Flipkart aims to be at the center of this change.
Documentation and Eligibility
To register on Flipkart Seller Central, you’ll be required to have the following documents and meet the respective eligibility criteria:
- Mobile Number: You must possess a contact number that remains active.
- Email ID: You must possess an email ID that remains active.
- GST Number: You must provide your Goods and Services Tax Identification Number (GSTIN) to seamlessly sell on the Flipkart selling portal throughout the nation.
- PAN Details: Your Permanent Account Number (PAN) is required for taxation purposes.
- Bank Account: You must have an active bank account number for seamless payments and receipt transactions.
- Product to Sell: To start selling on Flipkart, you must have at least 1 product to sell.
Registration Process on Flipkart Seller Account
Flipkart has divided seller registration into three simple steps to simplify the process. Here are the steps to register a Flipkart seller account:
First Process: EMAIL ID & GST
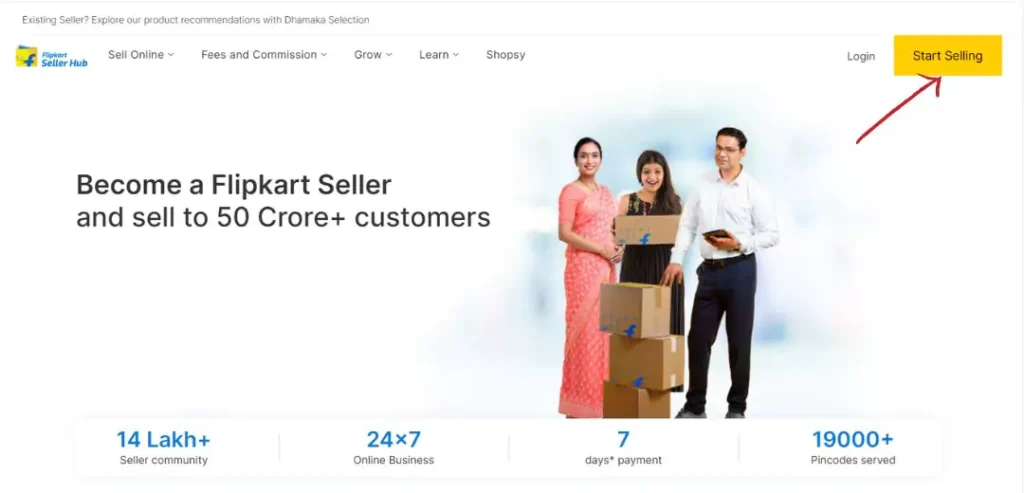
- Sign Up: Go to the Flipkart Seller Hub portal and click “Start Selling” to sign up (with your active mobile number and email ID).
- Mobile Number & OTP Verification: Enter the mobile number and click on the “Send OTP” text. Submit the OTP that you received on the number that you entered.
- Email ID: When completing OTP verification, enter the email id.
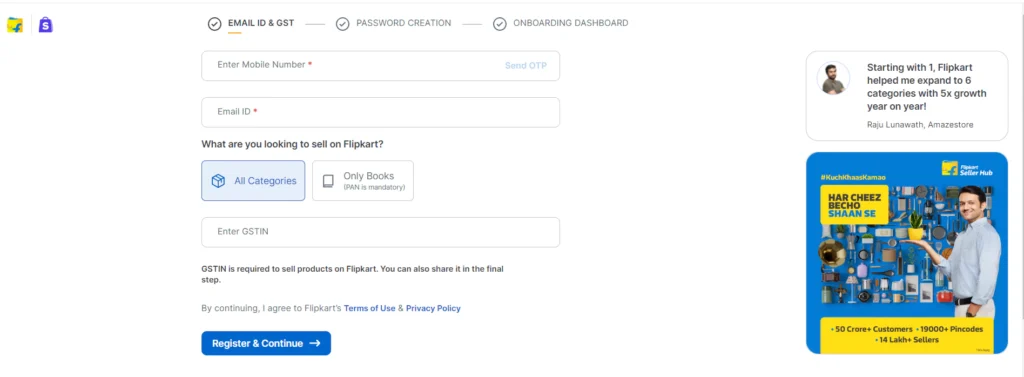
- Choose Category: After entering the mobile number and email id, Choose the category you wish to sell under “All Categories” or “Only Books.”*
- Provide Details: Give the taxation details. For example, if you choose all categories, you must enter the GSTIN number; if you select only books, you must enter the PAN number.
- Register & Continue: After filling in all the details, click the “Register & Continue” button.

Note:- Here are the details about Category options:
ALL Categories: If you select this option, you can sell various products under Flipkart’s guidelines, and a GSTIN number is mandatory for this option.
Only Books: If you choose the only books option, you can only sell books on the Flipkart seller platform. A PAN Card is mandatory for this option; a GSTIN number is not required.
Second Process: PASSWORD CREATION
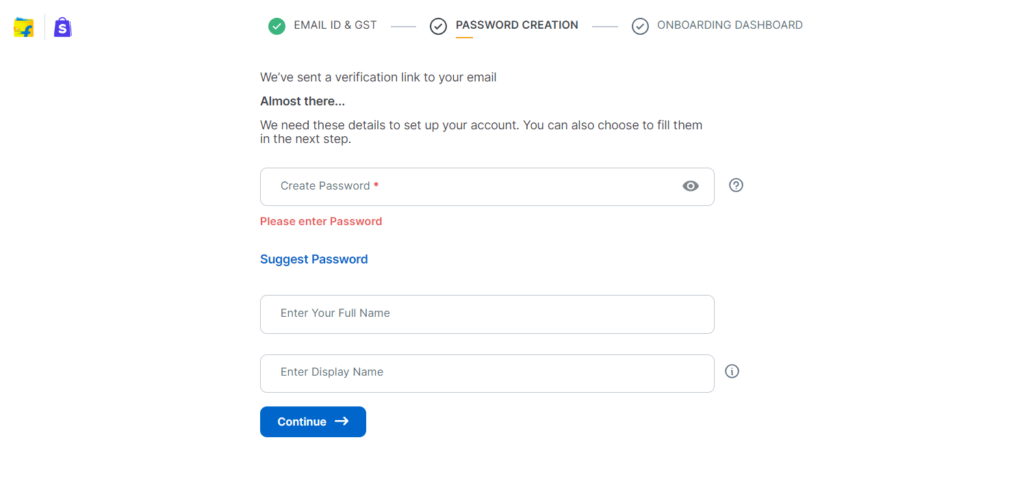
- Create Password: In this step, you must create a password with a minimum of 8 characters. This must contain at least one uppercase letter, one lowercase letter, and one special character. For example – Flipkart@1.
- Name: Now enter your full name and display name. After that, click on the Continue button.
Note: Your display name must be unique without space or special characters. Your display name will be shown on the Flipkart app and will also be used as your username during login.
Third Process: ONBOARDING DASHBOARD
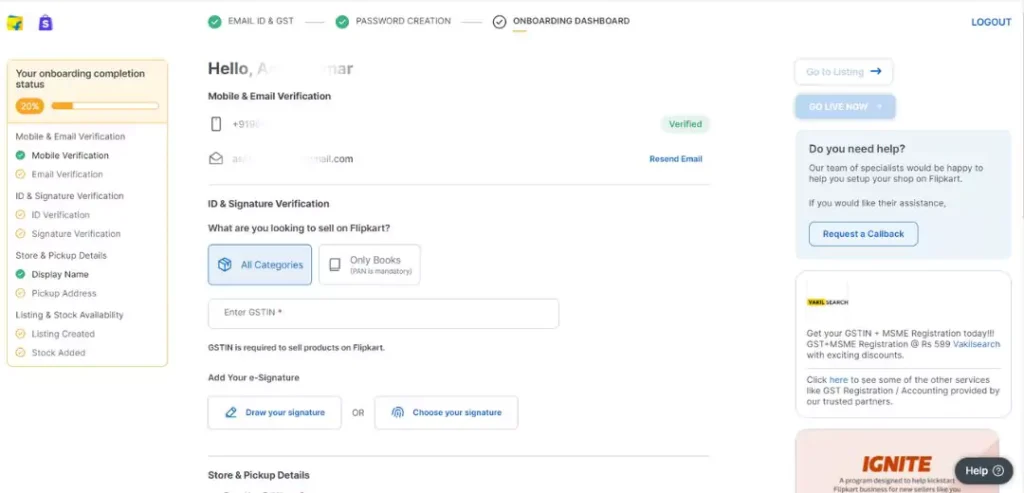
- Add e-Signature: You will see two options: ‘ Draw your signature’ and ‘Choose your signature.’ Choose the one as per your preference. Remember, this will be used in the invoice copy.
- Add Store Details: Input your full name, display name, a brief description of your store, and pin code, and click on “save.”*
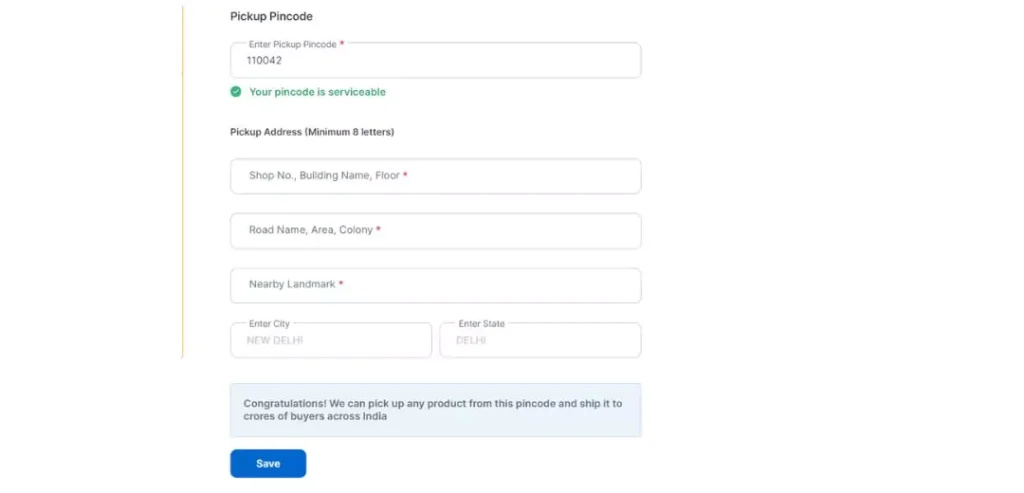
- Pickup Address: Enter the PIN code and provide the details of your pickup address for smooth order processing.
- Enter Bank Details: Input your bank account number and IFSC Code.*
- Create Listing: Click on “Go to Listing” or “List your products” to carry out the final step of selling on Flipkart successfully.
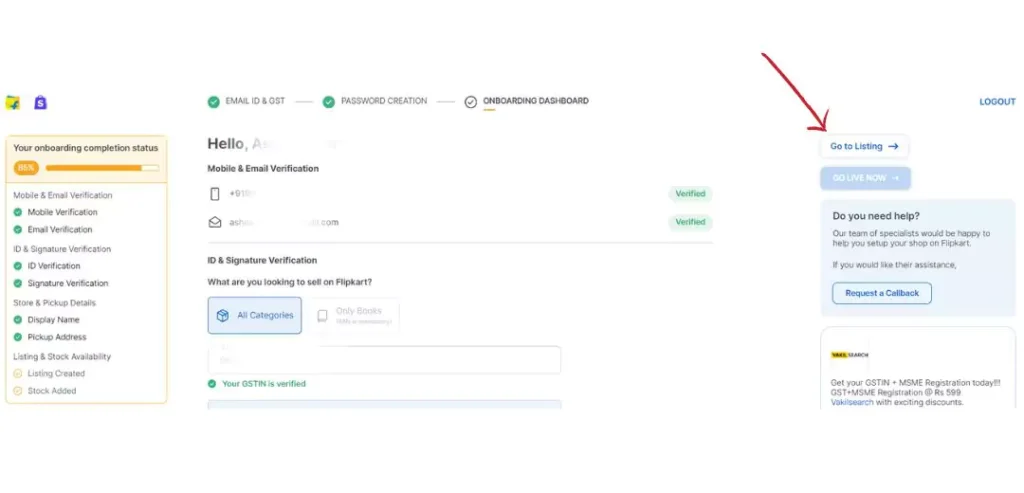
- If you opt for ‘All Categories,’ then GSTIN is mandatory. Your GSTIN is automatically verified, and once you are verified successfully, a green tick will appear alongside the message ‘Your GSTIN is Verified’ and the business information. If you opt for ‘Only Books,’ then you will be required to provide your PAN details mandatorily. Moreover, your PAN gets verified automatically, and once successfully verified, a green tick becomes visible alongside the message ‘Your PAN is Verified.’
- The pincode must match the pincode attached to your GST number.
- Your bank details should not be different from what is linked to your GST number.
Related Blog: How Become Meesho Seller?
Flipkart Seller Login Steps
You can easily log in to your Flipkart seller account by following the below easy steps:
- Visit Flipkart Seller Portal: Go to Flipkart Seller Central portal and click “Login.”
- Enter Mobile Number/Email ID: Input your registered mobile number or email ID.
- Enter Password: Enter the password that you created while registering.
- Access the Dashboard: After successful login, you will land on the main Flipkart seller panel of your very own Flipkart seller account.
Read Also: Myntra Seller Registration
How to List Products on Flipkart Seller Dashboard?
Adding products on Flipkart Seller is a seamless process. Flipkart provides four ways to get started with product listing. First of all, let’s take a look at these four ways:
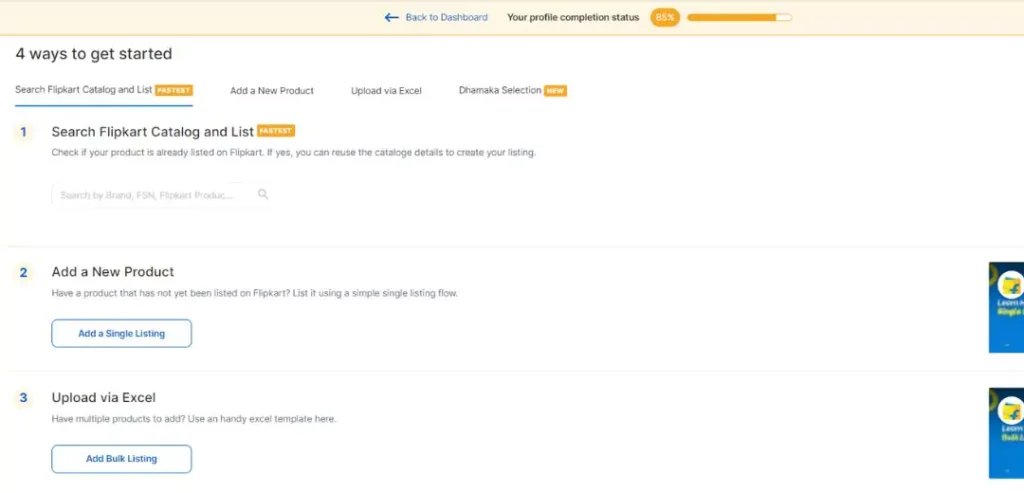
First Way to List Product:
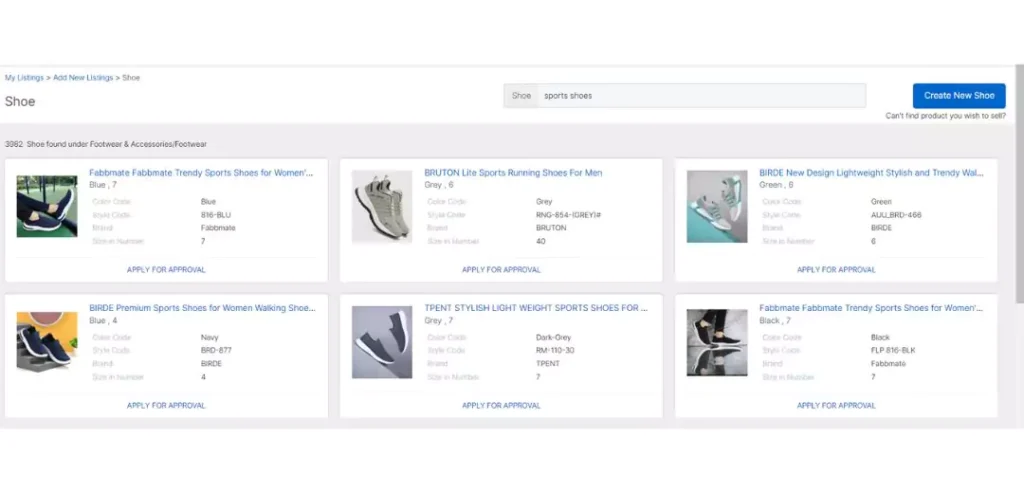
Search Flipkart Catalog and List: This is the fastest way to list your product on the Flipkart seller dashboard. With this option, you can choose a prebuilt catalog of your product. Follow the steps to list your product through this process:

- Search Product Category: Search your product category in the search bar.
- Select the Category: If the category is available on the Flipkart seller portal, then you can see the list of categories. You can choose one that suits your product.
- Select the Product: Now select the product that is similar to yours and wait for approval. If you didn’t find your product, click “Create New ..” in the upper right corner and fill in all the details with product photos.
Second Way to List Product:
- Add a New Product: In this process, search for your product and click on it.
- Select the Product: Now select the product that appears.
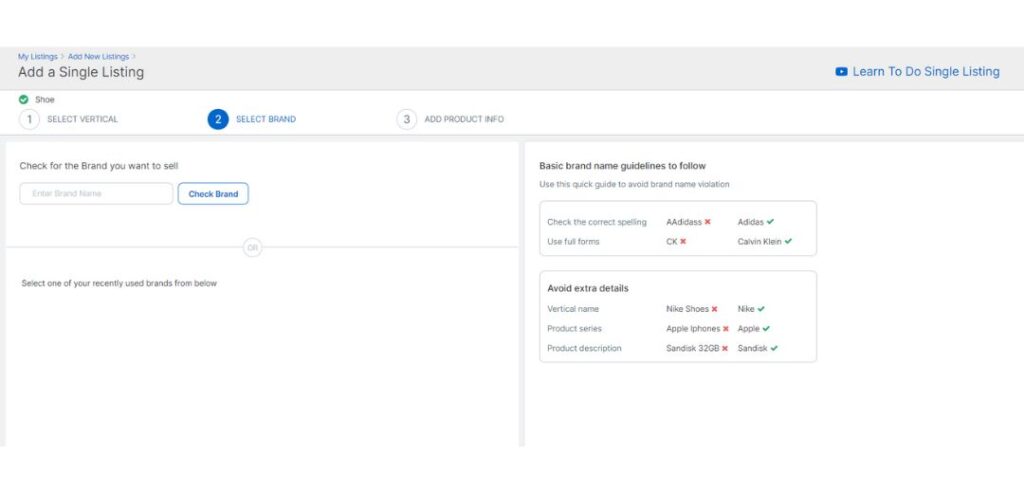
- Brand Name: After that now, enter your product’s brand name.
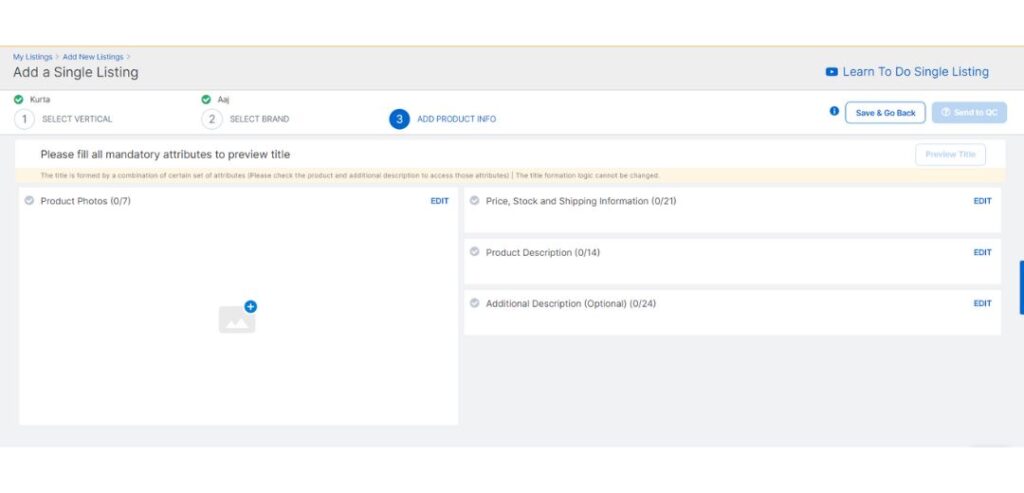
- Product Details: Now, enter your product details along with the image. Product Photos, Price, Stock, Shipping Information, Product Description, and Additional Description (Optional) are some information that sellers must submit.
- Save and Send to QC: After following these steps, save the product and click “Send to QC” for approval.
Third Way to List Product:
This process is used for bulk listing. You can mention the products on an Excel sheet and upload them if you have multiple products. Take a look at the following steps to carry it out:
- Download Template: Flipkart offers standard templates across genders for various product segments. Pick the correct product template for your product.
- Fill in the Template: You will be required to enter the details in the specific sections about your product in the template, such as product category, SKU, brand name, product ID, etc.
- Select Listing Type: In the listing section, tap on “My Listing” and then choose either “Add a single listing” or “Add listings in bulk.”
- Enter Details: Be it a single or bulk listing, choose your desired product category and brand, and provide other product information alongside uploading the product images.
Fourth Way to List Product:
In this process, Flipkart suggests the top-selling products based on their trends on Flipkart. You can go with that and list the product according to it.
If you follow these steps and input the correct details, you will successfully launch your product on the Flipkart seller app and start selling it.
Product Categories Available on Flipkart Seller App
There are numerous product categories that Flipkart offers to sell on its platform. Here are some of the popular ones:
- Shoes
- Jewelry
- T-shirts
- Furniture
- Makeup
- Mobiles
- Clothing
- Sarees
- Electronics
- Women’s Clothing
- Home Products
- Kurtis
- Beauty Products
- Paintings
- Watches
- Books
- Shirts
- Indian Clothes
- Toys
- Appliances
These are just a few examples; there are more than 3,000 categories to choose from. Whether you’re selling clothes, gadgets, or home items, Flipkart offers many opportunities to connect with a large number of customers.
Benefits of Selling on Flipkart Seller Hub
- Massive Customer Base: With a 45 crore customer base across 19000+ pin codes and access to shopping festivals such as the Big Billion Days (BBD) and more, Flipkart offers unparalleled opportunities to earn for sellers.
- Ease of Doing Business: The entire registration process for your Flipkart seller account can be carried out in under 10 minutes with just one product and a valid GST number.
- Big Billion Days: You get the opportunity to participate in Flipkart’s flagship sale event for the highest impressions. During the Big Billion Days Sale, some sellers see their sales grow up to five times more.
- Growth Opportunity: Existing sellers on Flipkart have witnessed an average of 2.8X rise in growth, 2.3X rise in visibility, and up to 5X growth in seasonal sales, especially in the Big Billion Days Sale.
- Stressless Shipment: Flipkart makes sure that, being a seller of Flipkart, you should care about the quality of your product rather than focusing on delivery management. Thus, it offers stress-free delivery of your products.
- Regular Payments: You can expect secure payments in 7 days from the dispatch date of your product.
- Low Cost of Doing Business: Flipkart platform mitigates operational costs notably.
The Endline
To give it a bottom line, becoming a Flipkart seller is a straightforward and seamless process. You can register, create compelling product listings, and tap into the diverse Indian space within 10 minutes only. Flipkart has seen significant growth in onboarding new seller partners. Compared to the 2022 year, it had a big jump of 220 percent in seller partnerships in 2023, and this growth is expected to continue in 2024.


